Add an LLM Sentiment node to your Data Flow. This node causes the LLM to assess the values in a selected column and assign each a "sentiment"; that is, a rating that records whether the content of the original comment is positive, negative, neutral (does not indicate a particular sentiment), or mixed. The sentiment value is typically generated using the default LLM and added to a new column.
Note: It is important to note that any of the Generative Artificial Intelligence (Gen-AI) nodes could potentially create a performance overhead, depending on the size of your model. You should, therefore, consider the inclusion of these nodes carefully, and perhaps configure your Sync Model settings with reference to your requirements. For more information, see Data Flow Ribbon.
Add an LLM Sentiment node
This task is part of a "data preparation" or "transformation" stage that lets you cleanse and improve your data before you write it to your target database.
Before you begin
You should have a Data Flow that includes at least one data source and one or more Tables. You are going to generate a new sentiment "rating" based on an assessment of one of the table's columns, creating a new column to store the sentiment.
If you do not have permission to add this type of node, you will not see the Gen-AI options in the Data Flow > Elements list.
Procedure
From the Data Flow page in Model Pro:
- Click Gen-AI in the left-hand menu and, from the submenu, drag-and-drop LLM Sentiment onto the canvas.
- Connect the Table that contains the column you want to generate a sentiment for to the LLM Sentiment node.
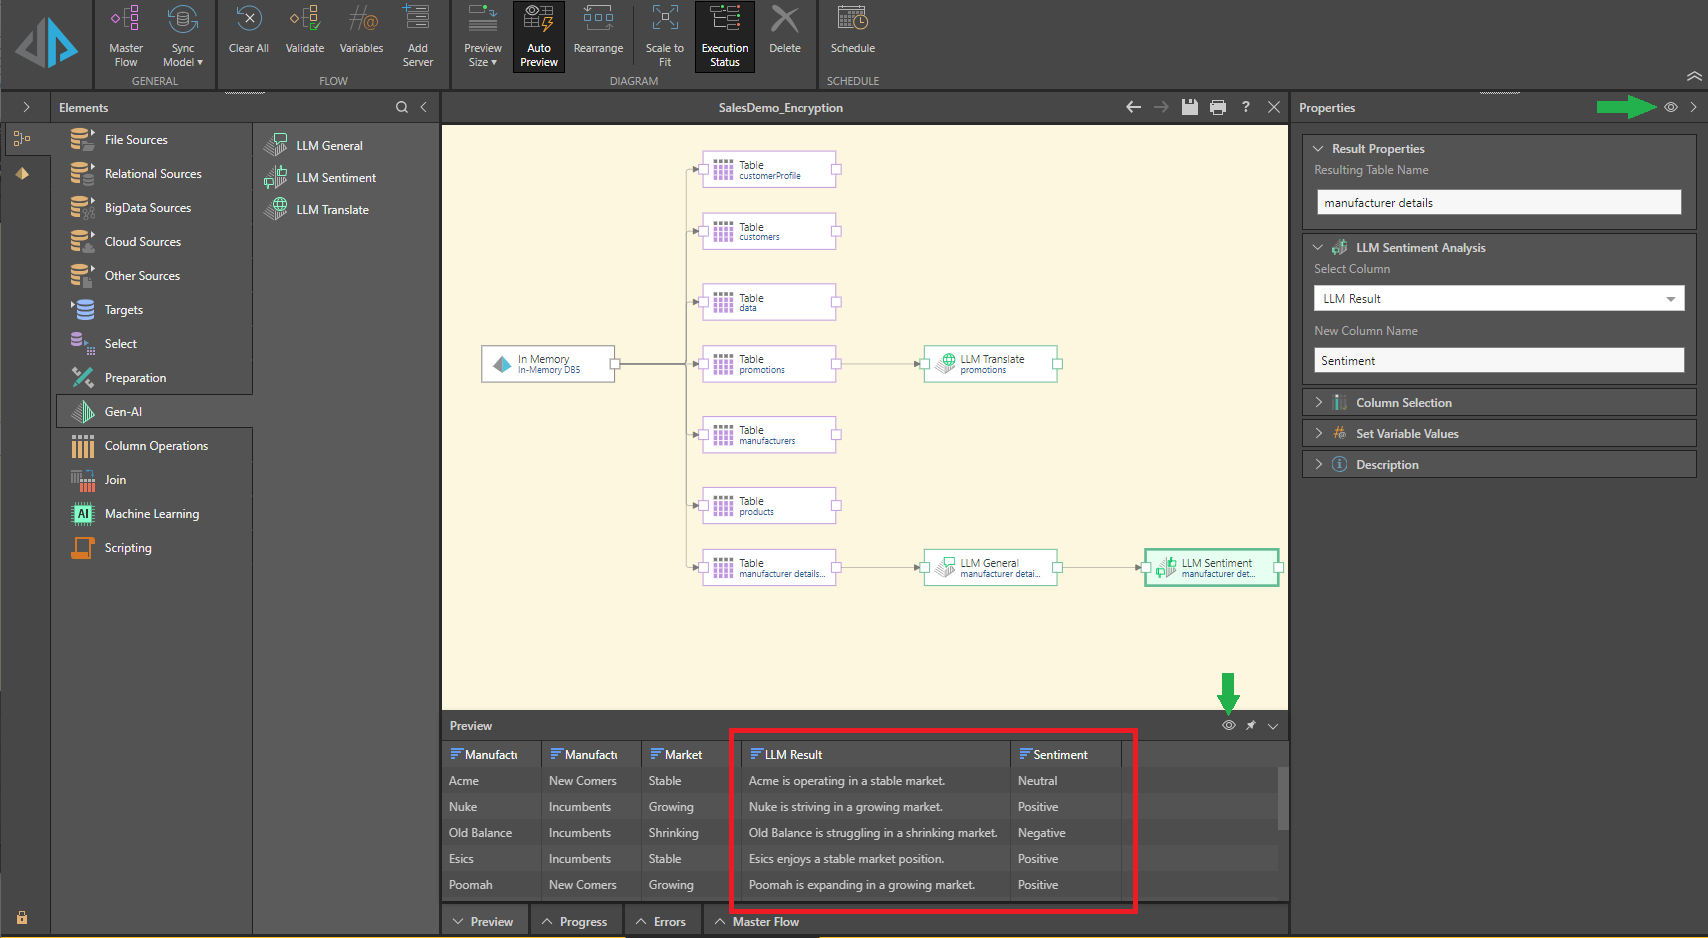
- Select LLM Sentiment and, from the Properties panel, set:
- Select Column: Select the name of the Column that you want to generate a sentiment for.
- New Column Name: By default, the name Sentiment is supplied for the new column.
- Optionally, if you don't want to use the default LLM for your sentiment generation, select an alternative LLM from the LLM Provider fields.
- Click Preview (the two buttons are shown with green arrows in the following example) and check that your sentiment column is created as you expect in the Preview panel.
- The preview creates a fixed number of rows (50 by default). To increase the number of rows, change the Preview Size option. For more information, see Datasource Preview.
- Click Save at any time to save your changes.

Note: The connection is created by selecting the "end connector" (red arrow) on the preceding node (in this case, the Table node) and then dragging your cursor to the "start connector" (blue box) on the LLM Sentiment node.
For more information about this option, see Using an alternative LLM Provider below.
Notes:
You can now continue building your Data Flow as usual.
Using an alternative LLM Provider
Typically your default LLM (as selected in the Admin Console's AI Settings page) is used for all generative activities in Pyramid. However, if you have some specialist task to perform and you know that one of your other LLMs performs that type of action better than the default, then you can use the LLM Provider options to select your preferred LLM just for this task:

To use an alternative LLM for the task represented by the selected node:
- Select the Alternative LLM Provider checkbox.
- Select the LLM Provider you want to use from the dropdown list.
Note: This list of LLM Providers only includes those LLM Providers in the Admin Console's LLM Manager page that are available to your tenant.
What next?
You may either want to continue processing your data or add a Target to your Data Flow at this point. The Target is the database that you want to use to store your processed data.
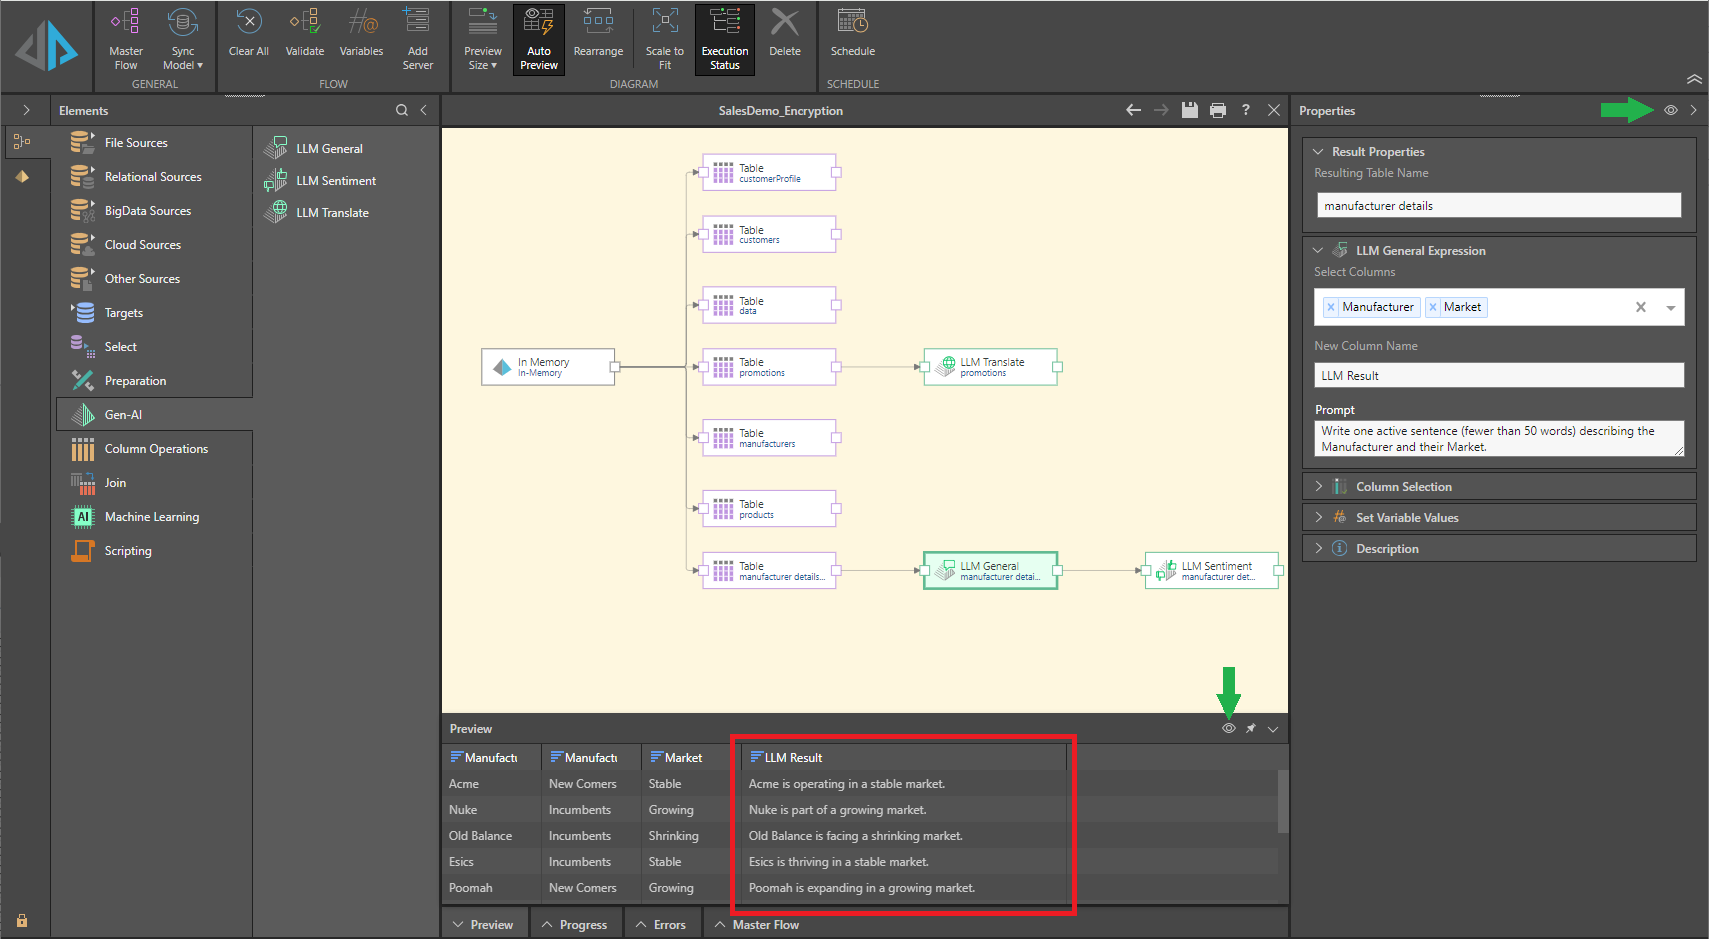
Example: LLM Sentiment
Note: In this example, the LLM Sentiment node is used to gauge the sentiment of the sentences generated using the LLM General node and written to the LLM Result column. You could do a sentiment analysis of the values in any column containing appropriate data. For more information, see LLM General.